Enable self-service access requests in Jumpcloud
This allows employees to request access to apps in Jumpcloud from the Jira Service Management portal, and optionally routes the request to their manager or the application owner for approval in Jira.
Once the manager approves the request, Jumpcloud assigns the user to the group, which automatically provisions the app.
End users get what they need more quickly, and removes the need for IT to manually manage individual requests.
This guide will walk you through the steps needed to set up Multiplier's self service access request workflow feature once you've connected your Jumpcloud account.
Steps
1. Turn on the enable application catalog setting in Multiplier's configuration. This can be accessed through the Apps > Manage your apps in the Jira nav.
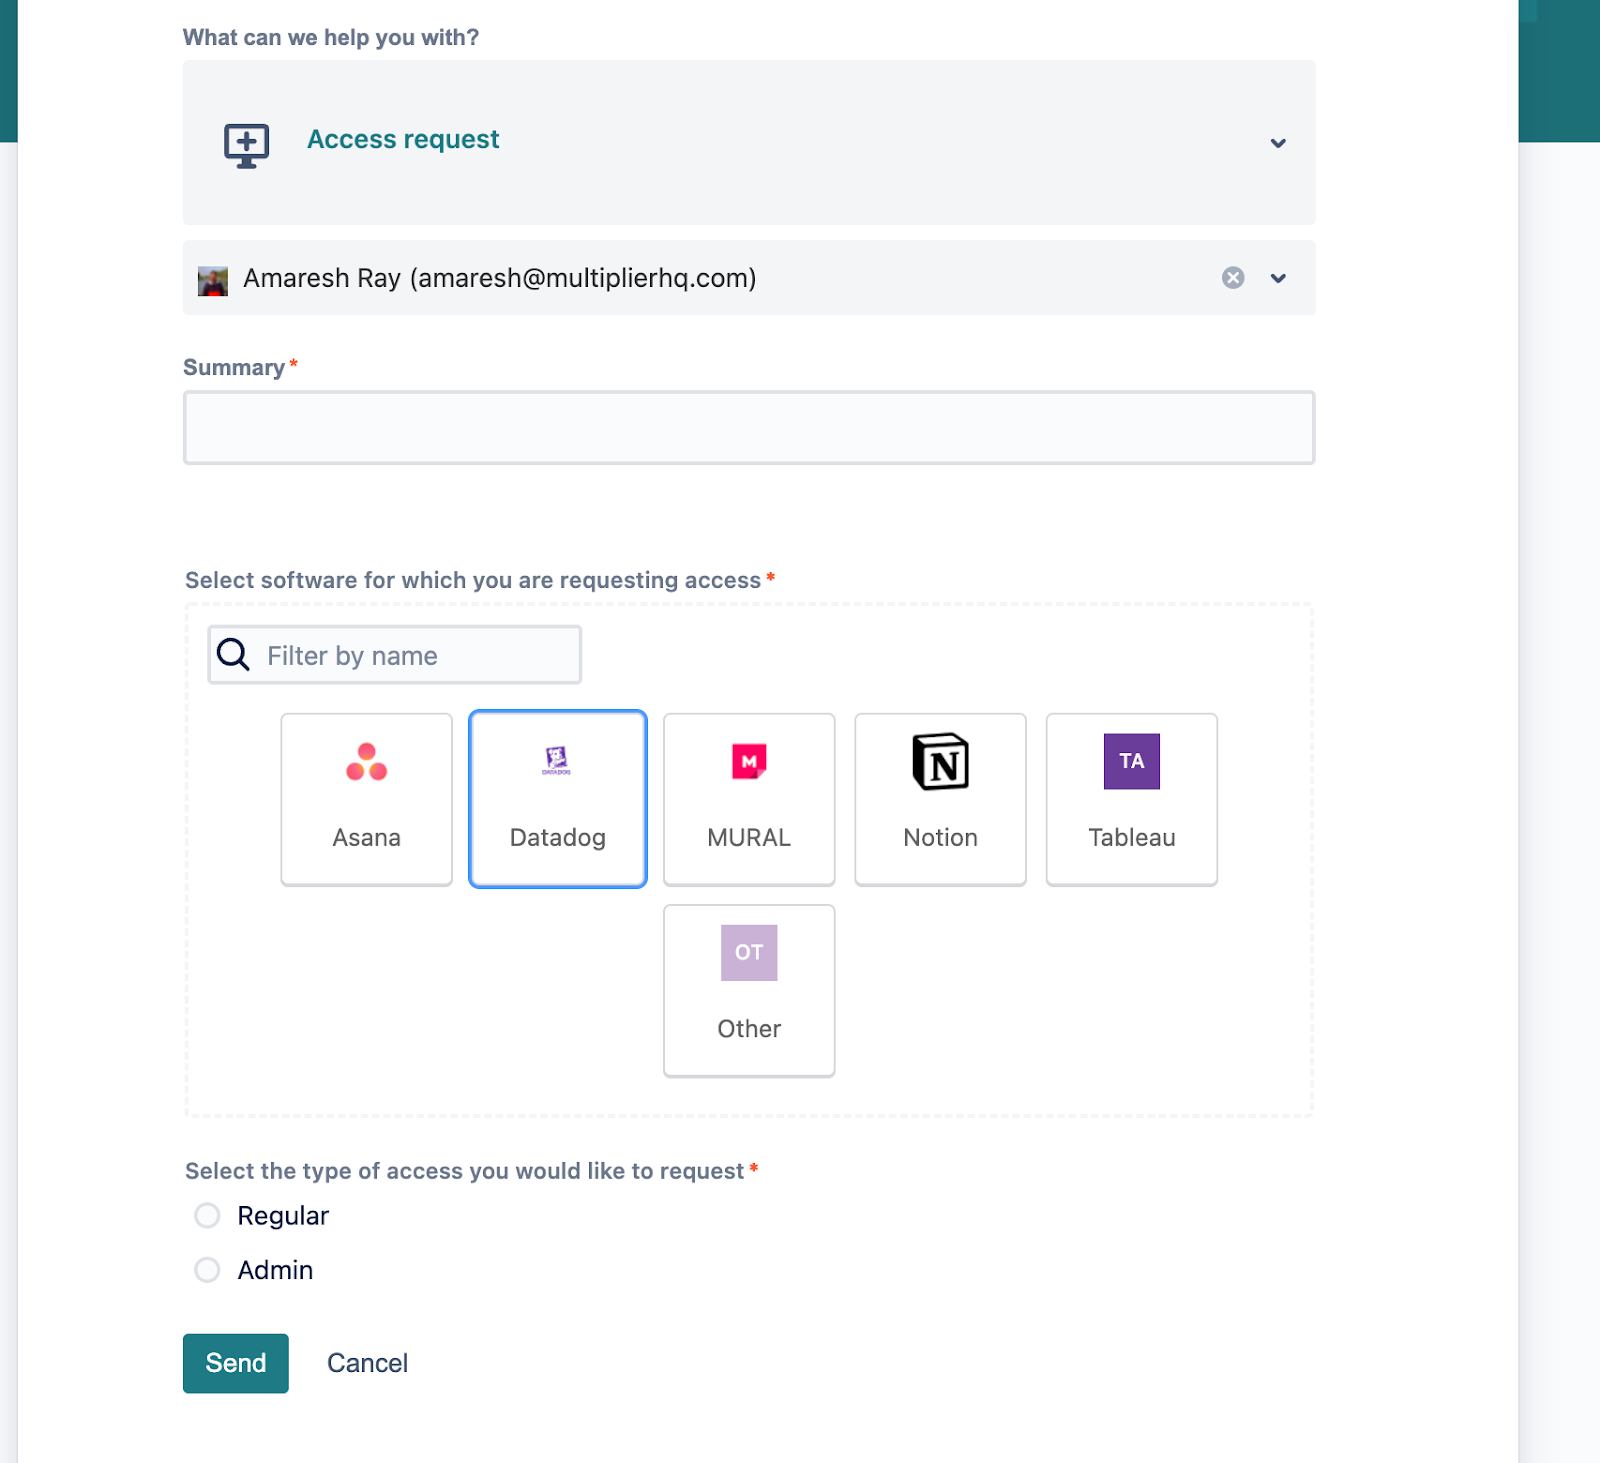
 2. To display a list of apps on the Jira Service Management portal, you will need to associate the app catalog with a Request Type. If you do not want to use an existing request type, then go to Project Settings > Request types and click Add new request type.
3. To provision apps immediately after they're requested, keep the require approval setting disabled. Otherwise, switching it on will display the default approval behavior when apps are requested, which can be further customized for each individual app.
4. If enabling approvals, you'll need to map the workflow status that a request transitions to once approval has been granted. This is how Multiplier determines whether approval has taken place so it can go ahead and carry out provisioning.
5. Select the field the issue uses for populating approvers (this is typically the Approvers field).
6. Select the default approver – this can either be the application owner, the requestor's manager or a Jira user of your choice.
7. Lastly, select the status Multiplier should transition the issue to once the app has been provisioned. If provisioning fails for some reason, this step will not be carried out.
Populating the App catalog
Multiplier will automatically discover apps once connected to your Jumpcloud instance. You can view this list by clicking on Apps > Multiplier in the Jira top nav.
By default, all apps appear with an 'Unassigned' status. To sanction apps that end users are able to request, change their status to 'Approved'.
Apps that have multiple identity groups mapped to them can be configured with different entitlements to let users select which type of access they're asking for. These access levels can then be mapped to different identity groups.
